
Before you begin
Domain connection costs ₦3,500 once per store on Free, Pro and VIP plans. Changing plans does not cancel paid connection access. Buy and renew the domain with your chosen domain provider. ShopWithNaija continues to host your store. Start with www.yourbusiness.com or shop.yourbusiness.com; use a CNAME connection. A bare root domain may need your provider’s secure redirect to the www address.
Publish your shop before activation. Your existing ShopWithNaija address remains available. A custom domain does not change payment eligibility, vendor verification, order responsibilities or safety restrictions.
The setup window automatically generates each store domain's unique TXT verification record and the CNAME target. You do not need to ask an administrator for DNS records. Screenshots below use an example store and example domains: always copy the values from your own live setup window, not from a screenshot. Domain buying inside ShopWithNaija is marked Coming soon; connecting a domain you already own is available.
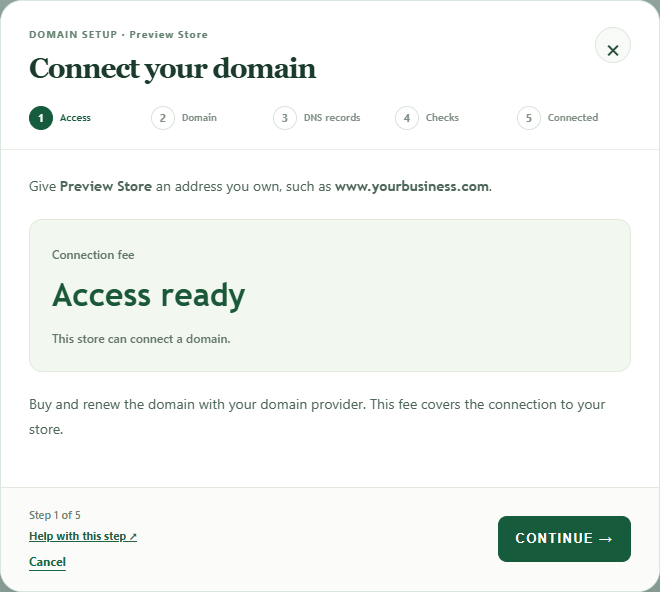
Step 1: Choose your store and review connection access
- Open your vendor dashboard, select the right store, then open Domains and choose Connect a domain.
- The Access stage shows the one-time connection fee or confirms that your store already has access. Accept the terms before opening Paystack if payment is required.
- Choose Continue when access is ready. Your domain registration and annual renewal remain separate from the connection fee.
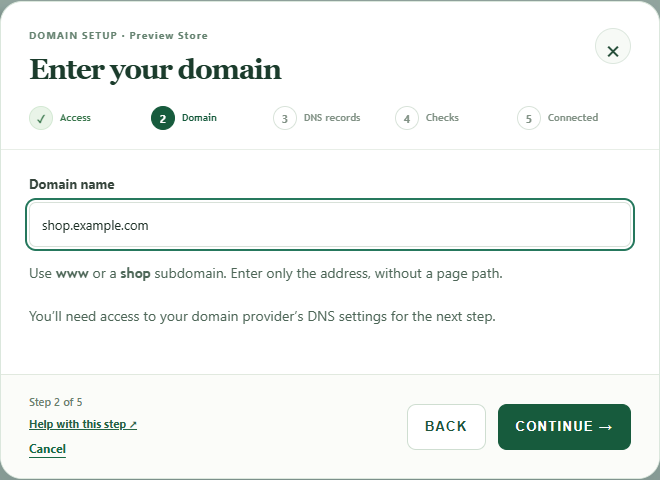
Step 2: Enter the domain address
- Use a domain you control, usually shop.yourbusiness.com or www.yourbusiness.com. Enter the domain name only, without a page path.
- Check the spelling and choose Continue. The next screen generates the records for that exact domain.
- A different domain address needs its own ownership proof; use the values shown for the address you are connecting.
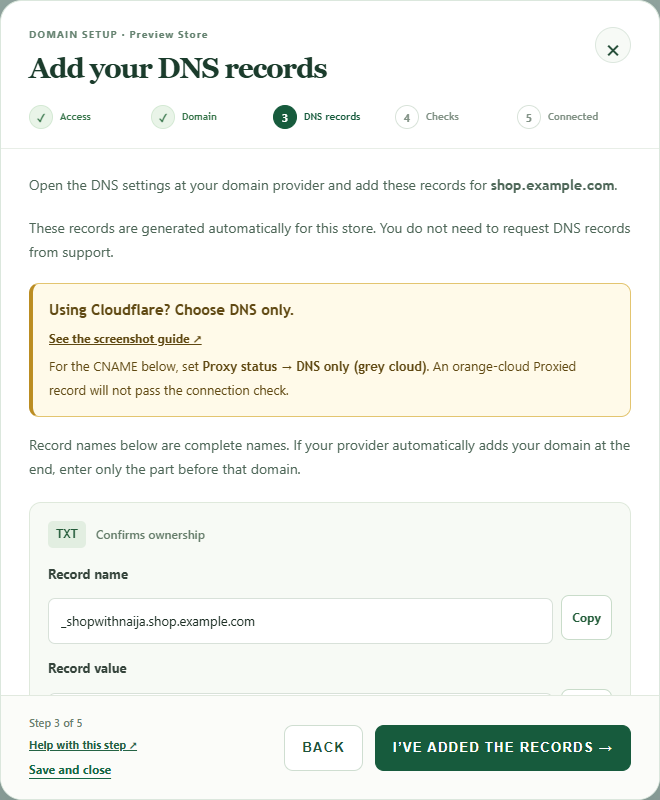
Step 3: Add the TXT and CNAME records
- Open DNS management at the provider whose nameservers control your domain. This can be different from the company you bought the domain from. Choose the provider instructions below.
- Add the TXT name and value exactly as shown in your own setup window. Keep this verification record while connected.
- Add the CNAME name and target shown in the same window. For example, in a DNS zone named yourbusiness.com, the short names are shop for shop.yourbusiness.com and _shopwithnaija.shop for its TXT record. Some providers accept the complete names shown by ShopWithNaija.
- On Cloudflare, change the CNAME proxy switch to DNS only: the cloud must be grey. Save the record. An orange Proxied cloud hides the CNAME from the connection checker.
- Keep existing email MX, SPF, DKIM, DMARC and unrelated records. If a record with exactly the same shop hostname conflicts with the CNAME, review that hostname rather than changing the whole domain or its nameservers.
- Return to ShopWithNaija and choose I have added the records. DNS records may need time to become visible.
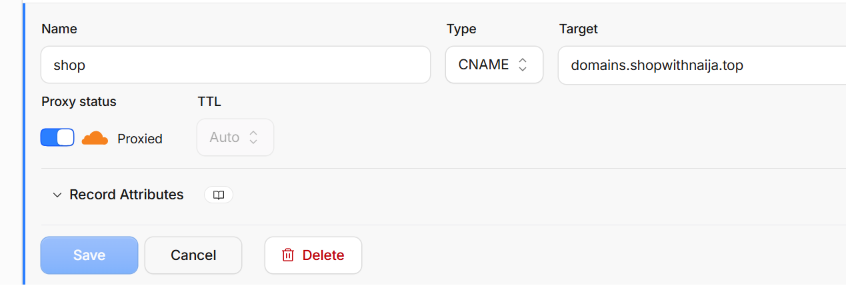
Cloudflare: turn off the orange proxy cloud
- Sign in to Cloudflare and select the domain, then open DNS and Records.
- Add or edit the CNAME. For shop.yourbusiness.com, use Name shop and Target domains.shopwithnaija.top. Keep TTL Auto.
- Click the orange Proxied switch so it changes to DNS only with a grey cloud, then choose Save. The screenshot below shows the BEFORE state that must be changed.
- Add the unique TXT record from your ShopWithNaija setup. In this example zone its short name is _shopwithnaija.shop; use the complete TXT value shown in your own dashboard.
- Return to the connection checker. If the CNAME is still hidden, confirm the saved record is DNS only and that CNAME flattening is not hiding that subdomain.
Truehost: open the DNS zone that serves your domain
- Sign in to your Truehost Nigeria client account. Open the DNS management area or DNS zone editor for the domain. If its nameservers point elsewhere, edit records at that DNS provider instead.
- Create the TXT record and CNAME from your ShopWithNaija setup. For a shop subdomain, the short CNAME name is shop. Use the exact TXT name and value supplied for your store.
- Save both records. If your Truehost service uses cPanel DNS management, follow the Zone Editor instructions below. Do not buy hosting or move nameservers just to connect the store.
Namecheap: use Advanced DNS or your active DNS host
- Sign in to Namecheap, open Domain List and choose Manage beside the domain.
- If the domain uses Namecheap BasicDNS, PremiumDNS or FreeDNS, open Advanced DNS and add the TXT and CNAME under Host Records.
- Namecheap Host fields normally use the part before your domain: shop for the CNAME and _shopwithnaija.shop for the TXT when connecting shop.yourbusiness.com. Enter the exact target and verification value from ShopWithNaija, then save.
- If the nameservers belong to your hosting provider or Cloudflare, add the records there instead of in Namecheap Advanced DNS.
GoDaddy: add the records in DNS management
- Sign in to your GoDaddy Domain Portfolio and select the domain, then open DNS.
- Add a TXT record with the name and verification value from your own setup. Add a CNAME for the shop or www subdomain pointing to domains.shopwithnaija.top.
- For shop.yourbusiness.com, GoDaddy Name normally uses shop for the CNAME and _shopwithnaija.shop for the TXT. Save the records.
- If another provider manages the domain nameservers, make these changes there instead.
cPanel: use the Zone Editor
- Open your hosting account cPanel and find Zone Editor in the Domains area. Choose Manage beside the correct DNS zone.
- Add the TXT and CNAME records from your ShopWithNaija setup. Some cPanel versions require the complete record name, so check the name that will be saved before confirming.
- Save the records. Zone Editor changes only work if the domain actually uses that hosting service for DNS.
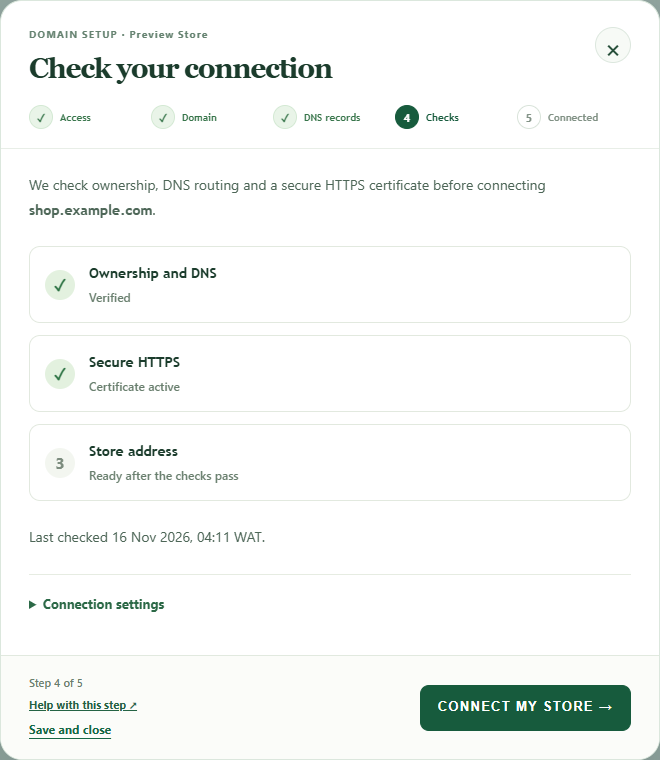
Step 4: Check DNS, publish the store and prepare HTTPS
- Choose I have added the records or Check connection in the setup window. Read the result and correct the specific record mentioned in any notice.
- If the store is still a draft, add a logo and at least one active product, then publish it from My shops. Domain settings stay saved while you do this.
- The service checks domain ownership and routing before preparing a secure certificate. Add any additional certificate-verification record shown in the setup.
- When DNS and HTTPS both show ready, choose Connect my store. You do not need an administrator to supply new records or manually connect a normal eligible store.
Step 5: Open and test your connected store
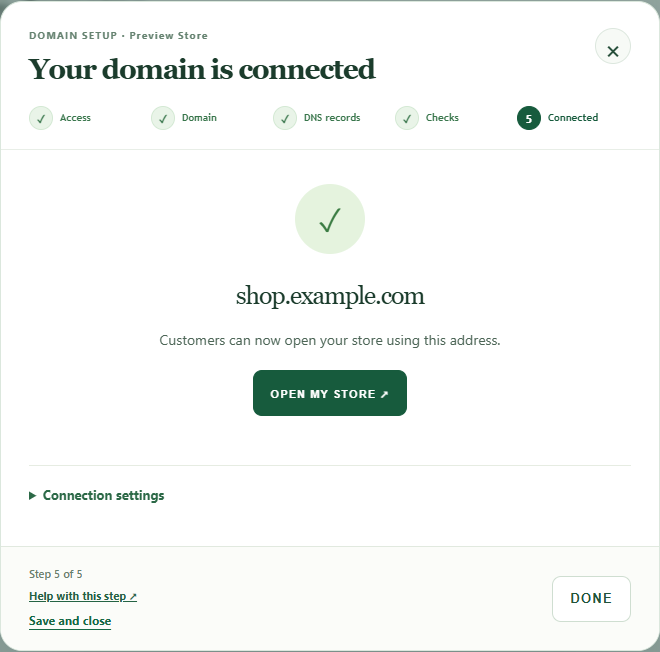
- The Connected screen shows the store domain and an Open my store link. Open it and check the store and a product page.
- The dashboard marks the chosen address Primary. Keep the ownership TXT and CNAME in place and renew your domain with its provider on time.
- If you edit DNS later and the connection stops, reopen Domains and use Check connection to identify what changed.
Fix a connection that is still waiting
- Ownership TXT missing: copy the complete value from the same domain entry in your own dashboard. Do not reuse a token from screenshots or another store.
- CNAME not visible: on Cloudflare choose DNS only and save. Check that your DNS provider did not append the domain name twice.
- Store not published: add a logo and an active product, then publish from My shops. A private draft cannot serve visitors on a custom domain.
- HTTPS pending: follow any extra certificate instructions shown and check again later. DNS changes and certificate checks are separate steps.
- No DNS editor at the registrar: use the company named in your domain nameservers. Buying a domain at one provider does not mean it manages DNS.
Shopping and account security
Store and product pages use your connected domain. Customers can add multiple products to the shopping bag on the same page. Checkout transfers the selected product IDs and quantities to the main ShopWithNaija site, where prices, stock, account access and payment eligibility are checked again.
Sign-in, admin pages, support conversations and payment processing remain on ShopWithNaija. The domain connection never grants access to your domain provider account or to another shop.
Manage, renew or remove a connection
The dashboard shows ownership, DNS, HTTPS and activation progress, with the latest check and useful error messages. Two domain addresses can be saved per shop. A domain can belong to only one shop connection.
Keep your domain registration and DNS records current. Connection access stays with this store and cannot be transferred to a replacement store after deletion. A full refund or payment dispute removes or pauses connection access; contact support for a review. Your original ShopWithNaija shop address remains available. Unpublished, deleted, suspended or banned stores are not served through a custom domain.
To disconnect, type the complete domain name in the confirmation field. Public routing is disabled first. Certificate cleanup is retried if the provider is temporarily unavailable. After cleanup, connecting the domain again requires a new ownership proof. Contact support if you acquired a domain still connected to another account.
Admin suspension requires a recorded reason. Reopening a suspended connection requires fresh verification; it does not automatically restore the previous primary address.
Still need a hand?
Ask the help assistant, or contact [email protected]. Keep passwords and payment security codes out of messages.
Get help ↗